Before using the integration it is necessary to configure credentials that will be used for accessing API of the Dynamics 365 Business Central instance. To configure the credentials, follow the instructions below.
1. Register an Azure AD application for authentication to Business Central
Sign in to the Azure portal: https://portal.azure.com
Search for “App registrations”
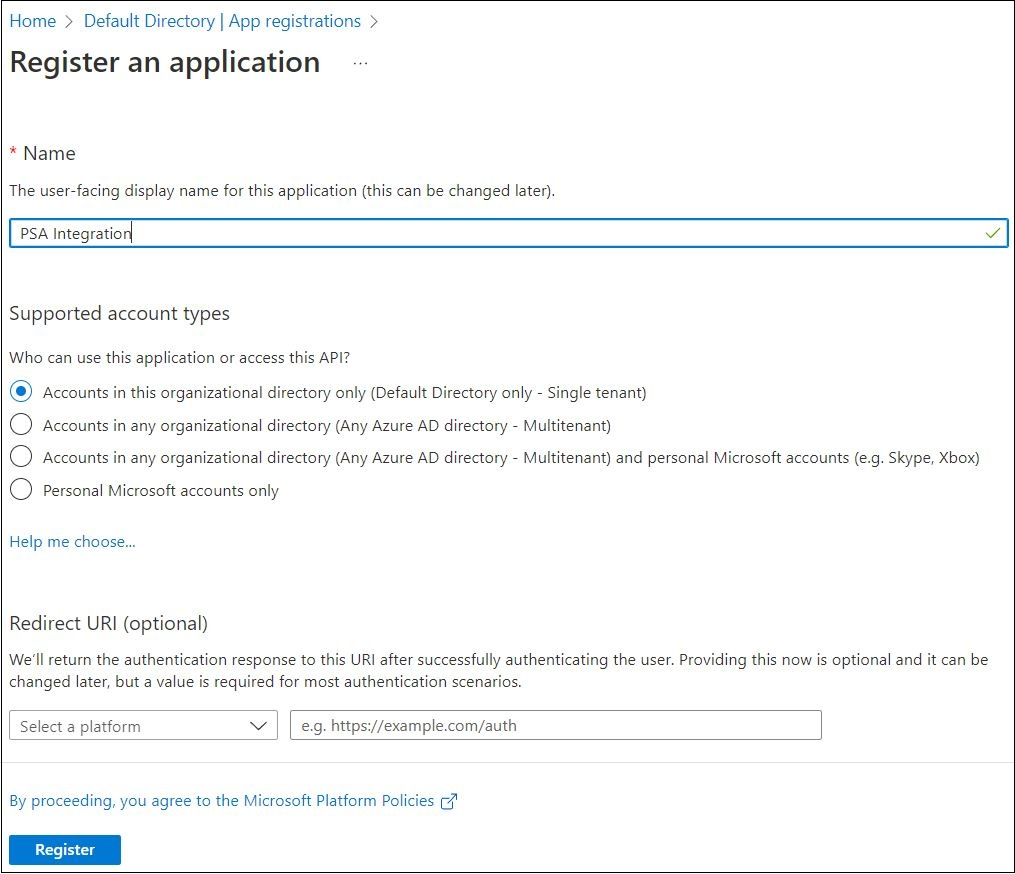
Create a new registration
Name. A unique name for your application
Supported account types. Select Accounts in this organizational directory only (Microsoft only - Single tenant)
Request URI.
Choose “Public client/naite”
Specify https://businesscentral.dynamics.com/OAuthLanding.htm
Click “Register”
 |
|---|
Register an application in the Microsoft Azure Admin Portal |
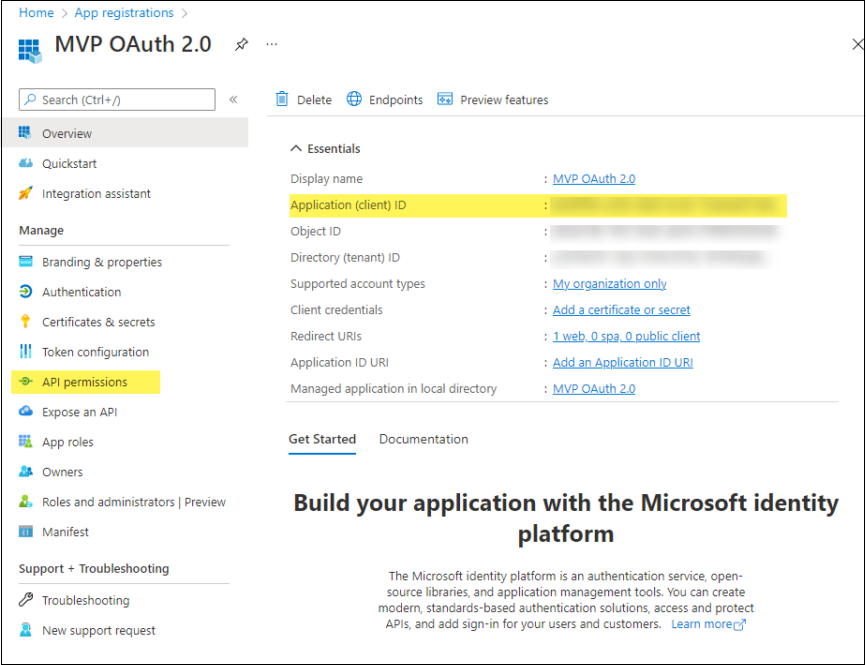
After that, an overview of your application will be displayed The following information from this page will be required to set up the integration:
Application (client) ID . This is the application ID that will be used as the user name in Business Central
Copy and save this Application (client) ID, as it will be needed in BC
 |
|---|
Copy and save the Application (client) ID |
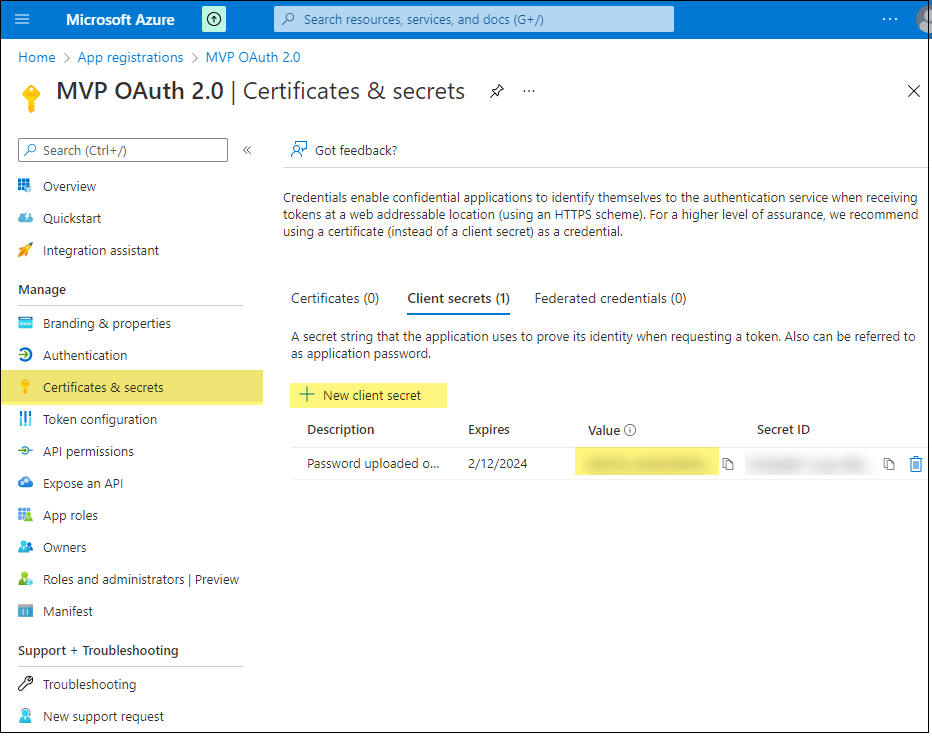
Create a client secret for the registered application.
Select Certificates & secrets
Select “+ New client secret.”
Add a description, select a duration, and click Add.
 |
|---|
Create a client secret for the registered application. |
Make sure to copy and save the secret as it will not be displayed ever again. It will be used as a password in the integration.
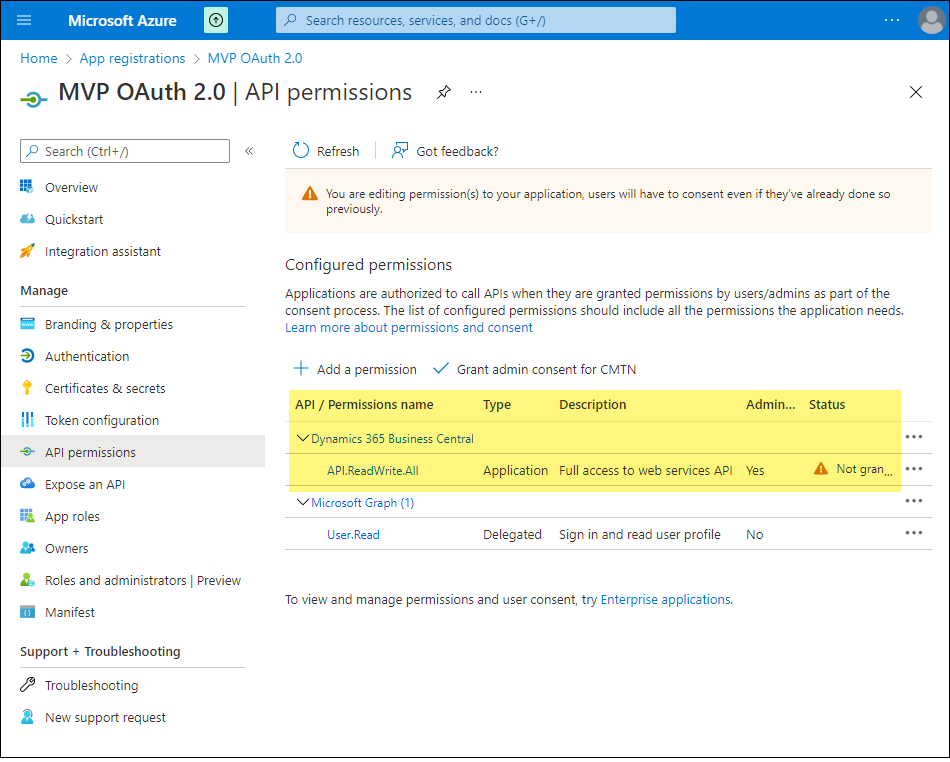
Grant the registered application the API.ReadWrite.All permission to the Dynamics 365 Business Central.
Select API permissions > Add a permission > Microsoft APIs.
Select Dynamics 365 Business Central.
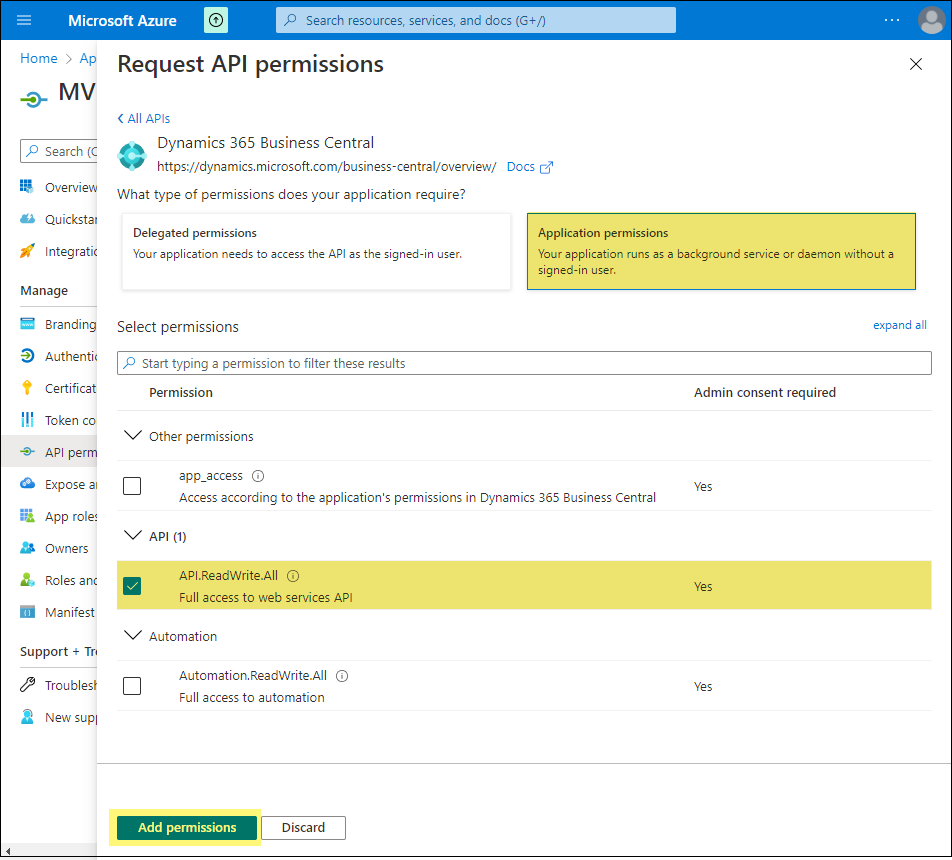
Select Application permissions, select API.ReadWrite.All, then select Add permissions.
Grant admin consent for that permission by selecting it in the list and then choosing Grant admin consent for <tenant name>.
This concludes registration of the Azure AD application.